

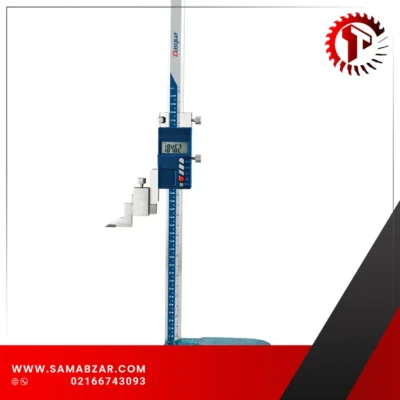
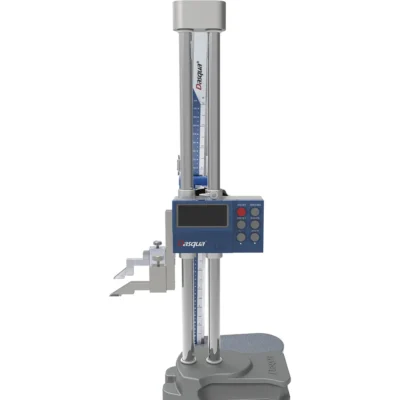
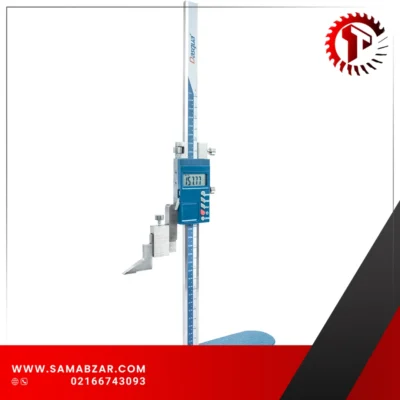
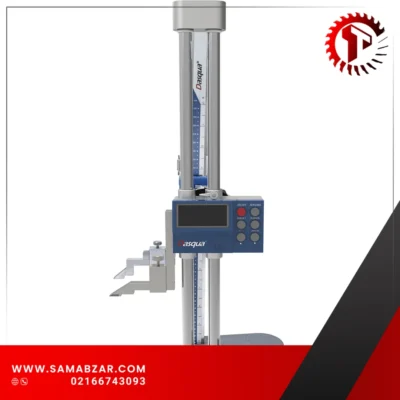
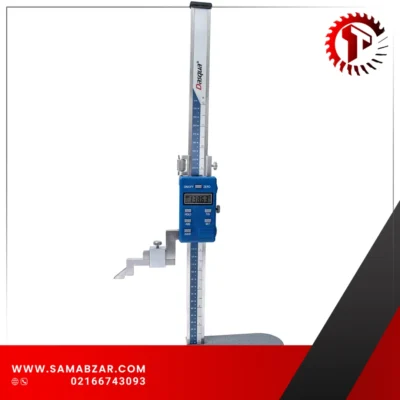
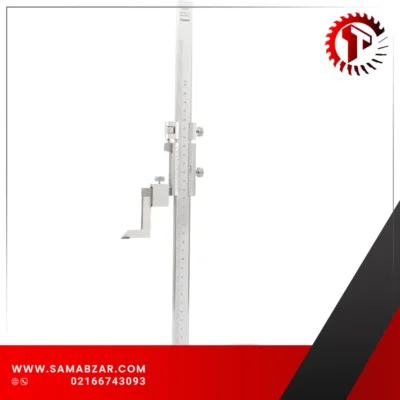
| مشخصات کالا | کد کالا | سایز | دقت |
| ارتفاع سنج از جنس استنلس استیل | 3001-0105 | 0-300 میلی متر | 0/02میلی متر/0-12″/0/001″ |
| ارتفاع سنج از جنس استنلس استیل | 3001-0120 | 0-600 میلی متر | 0/02میلی متر/0-24″/0/001″ |
| ارتفاع سنج از جنس استنلس استیل | 3001-0125 | 0-1000 میلی متر | 0/02میلی متر/0-40″/0/001″ |
دستورالعمل استفاده از ارتفاعسنج (Height Gauge)
۱. پیش از استفاده، پیچهای قفل قاب خطکش و پیچ تنظیم دقیق را شل کنید. سپس نوک خطکش (Head)، پایه ارتفاعسنج، و سطح میز کار را با یک پارچه تمیز و بدون پرز کاملاً پاک کنید.
۲. بررسی نقطه صفر:
قبل از شروع اندازهگیری، لازم است موقعیت صفر بررسی شود. قاب خطکش را بهآرامی حرکت دهید تا سطح اندازهگیری نوک خطکش با سطح میز تماس پیدا کند.
زمانی که نوک به سطح نزدیک میشود، از پیچ تنظیم دقیق برای تماس نهایی استفاده کنید. در این حالت، خط صفر ورنیه باید دقیقاً با خط صفر روی مقیاس اصلی منطبق باشد.
اگر همراستایی وجود ندارد، پیچ قفل را باز کرده و با استفاده از پیچ تنظیم، مقیاس اصلی را تنظیم نمایید تا خطوط صفر منطبق شوند. سپس پیچ را مجدداً سفت کنید تا موقعیت تنظیمشده تثبیت شود.
۳. اندازهگیری:
قطعه مورد نظر را روی میز کار قرار دهید. نوک اندازهگیری را طوری تنظیم کنید که اندکی بالاتر از سطح قطعه قرار گیرد. سپس با استفاده از پیچ تنظیم دقیق، بهآرامی نوک را پایین بیاورید تا با سطح قطعه تماس یابد.
از آنجایی که ارتفاعسنج دارای نیروی اندازهگیری یکنواخت نیست، تغییر در نیروی واردشده میتواند باعث کاهش دقت شود.
برای افزایش دقت، میتوان از ساعت اندازهگیری یا ساعت تستر بهجای نوک خراشزن استفاده کرد.
ساعت اندازهگیری را با استفاده از گیره مخصوص (در صورت وجود) روی ابزار نصب کنید. سپس نوک ساعت را با سطح میز تماس دهید و روی عدد صفر تنظیم کنید. عدد ارتفاعسنج را یادداشت نمایید. سپس قاب را جابهجا کرده و نوک ساعت را با سطح قطعه تماس دهید، دوباره روی صفر تنظیم کرده و عدد ارتفاع جدید را بخوانید.
اختلاف این دو مقدار، ارتفاع قطعه مورد نظر خواهد بود.
۴. خواندن مقدار:
پس از انجام اندازهگیری، با بستن مهره قفل روی قاب خطکش، موقعیت را ثابت نگه دارید.
برای خواندن صحیح، خط دید باید بهصورت عمود بر خطوط مدرج باشد تا از خطای پارالاکس جلوگیری شود. در صورت نیاز، میتوان از ذرهبین برای خواندن دقیقتر استفاده کرد.
۵. خطکشی (Scribing):
برای خطکشی، ابتدا ارتفاع مورد نظر را با استفاده از پیچ تنظیم دقیق تعیین کنید. پس از رسیدن به اندازه مطلوب، پیچ قفل را سفت کرده و عملیات خطکشی را انجام دهید.
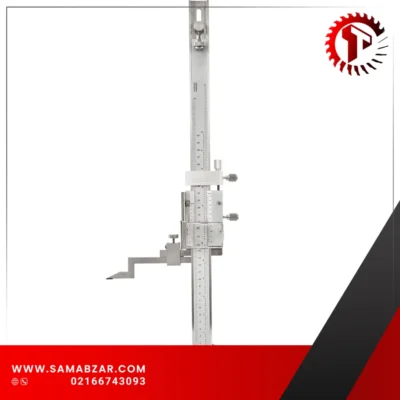
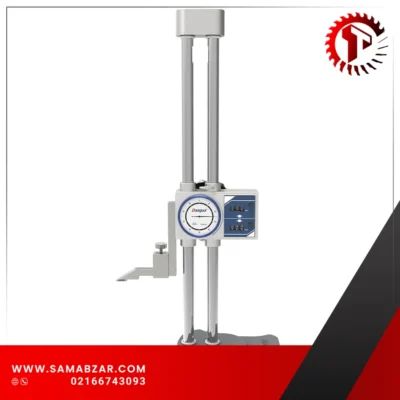
نصب ساعت اندازهگیری یا تست اندیکاتور
ارتفاعسنج را میتوان همراه با ساعت اندازهگیری یا ساعت تستر (Test Indicator) نیز بهکار برد.
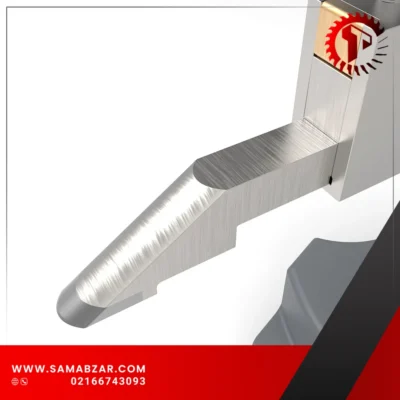
برای این منظور، ابتدا نوک خراشزن (Scribing Head) را از دستگاه جدا کرده و سپس با استفاده از اهرم نگهدارنده (Clamping Lever)، ساعت تست یا ساعت اندازهگیری را مطابق تصویر نصب نمایید.
Height Gauge Operating Instructions
-
Before use, loosen the locking screws of both the ruler frame and the fine adjustment device. Clean the scribing head, the base of the height gauge, and the surface of the working platform using a clean, dust-free cloth.
-
Zero Position Check:
Before measurement, the zero position must be verified. Gently move the ruler frame so that the scribing head’s measuring surface lightly touches the working platform. As it nears the platform, use the fine adjustment screw to bring it into full contact.
At this point, the zero line on the vernier scale should align with the zero line of the main scale. If they are not aligned, loosen the locking screw and adjust the main scale using the fine adjustment screw until both zero marks are in alignment. Then tighten the screw to secure the adjustment. -
Measurement:
To begin measuring, place the workpiece on the working platform. Raise the scribing head slightly above the surface of the workpiece. Slowly lower the scribing head using the fine adjustment screw until it gently contacts the surface.
Since a height gauge does not apply a constant measuring force, variations in user pressure can affect accuracy. To improve precision, you can use a dial indicator or test indicator instead of the scribing head.
Attach the indicator using the optional clamp. After installation, move the indicator’s contact point to touch the working platform and set the indicator to zero. Record the height on the height gauge. Then move the frame so the contact point touches the workpiece, set the indicator to zero again, and read the new value on the height gauge.
The difference between these two readings is the measured height of the workpiece. -
Reading:
After measurement, lock the nut on the ruler frame to secure the position. Always ensure that your line of sight is perpendicular to the scale markings to avoid parallax error. A magnifier may be used for easier reading. -
Scribing:
To scribe, adjust the scribing head to the desired height using the fine adjustment screw, tighten the locking screw, and perform the scribing operation.
Installation of Indicator Gauges / Test Indicators
The height gauge can be used in conjunction with an indicator gauge or a test indicator.
To do this, remove the scribing head and install the test indicator using a clamping lever, as shown in the diagram below.


دیدگاهها
هیچ دیدگاهی برای این محصول نوشته نشده است.